Video Producer
Every AI video tool can generate clips. AdaL produces finished videos.
Video Producer is built into AdaL. There is nothing to install, no plugin to enable and no API key to add. Describe the video you want in plain words and AdaL handles the rest — planning, generating shots, editing, and rendering.
It writes a plan into your project, then generates or cuts the clips it needs: titles, voice-over, music, sound effects, or the footage you already have. It trims, sets levels, adds transitions, and measures the result (length, loudness, pacing) instead of guessing. Every change you ask for becomes a new version you can play, compare, or roll back to. Every file stays in your project folder, tagged with where it came from and the prompt that made it.
Video Producer loads only when a task asks for a video. It never appears during coding sessions. See Capabilities.
1. Ask for a video
Open a chat in a project folder and describe what you want — length, aspect ratios, and what the viewer should take away. For example:
Make a 10-second cinematic teaser for a fictional coffee brand called Ember:
a photoreal hero shot of a steaming cup at golden hour, slow push-in, the word
EMBER revealed in elegant animated type, subtle sound design, and an end card.
Deliver 16:9 and 9:16.
AdaL writes its plan, generates the clips, and renders both sizes. When it finishes it tells you where the files are.
To revise, keep talking in the same chat: "make the reveal slower", "swap the hero shot", "go back to version 4". Each message creates a new version.
2. Find the video in Files
Open the Files panel. AdaL marks video projects so you can spot them in a large folder:

| Mark | Where | Meaning |
|---|---|---|
| Pink AdaL video tag | The project folder | This folder is an AdaL video project |
| ▦ 8 | The assets/ folder | 8 files in the project's media library |
| Pink dot | A .mp4 file | A rendered video. Hover to see how many versions it has |
Hover the assets/ folder and click Open media to browse the media
library (see step 5).
3. Watch the video and its timeline
Click the .mp4 with the pink dot. It opens with two tabs: ▶ Video and
⑂ Canvas.
▶ Video plays the current version. Below the player is the timeline:
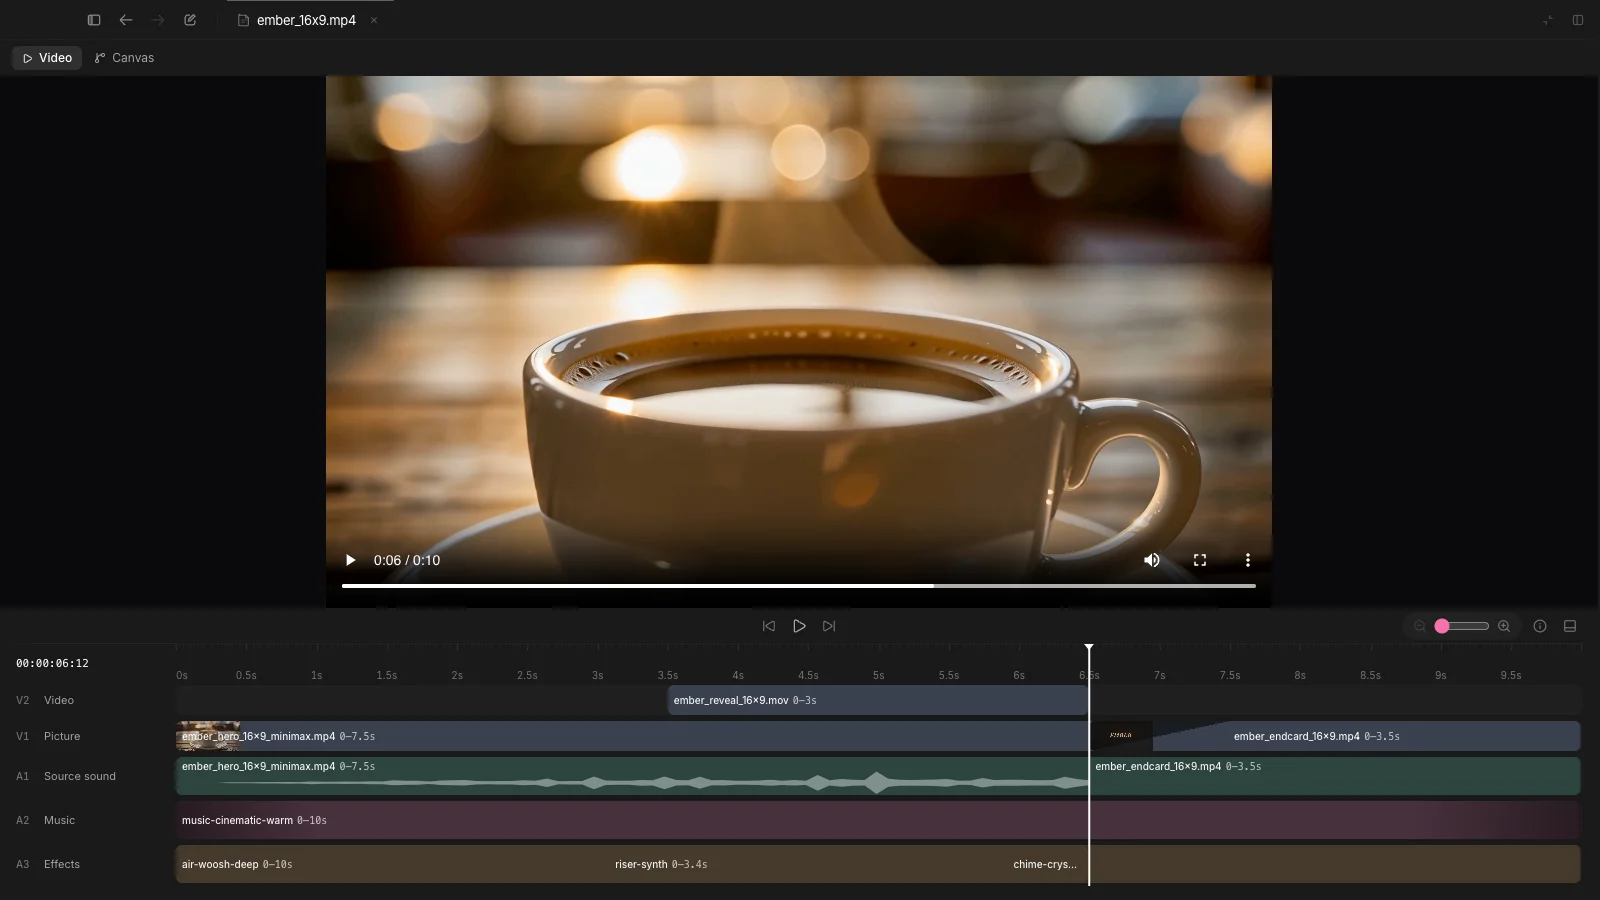
Each row is a track — picture and overlays at the top, then source sound,
music, and effects. Each block is one clip, labeled with its file name and the
segment in use (0–7.5s means the first 7.5 seconds). Drag the playhead or
click a clip to jump to its source file.
4. Compare versions on the Canvas
Click ⑂ Canvas. Every version appears as a card, in the order it was made.
The card with the pink border and the CURRENT tag is the version the
.mp4 holds right now.

Each card shows a still and a short note about what changed, for example "remove color grade blowing out exposure".
Click a card to open it on the right:
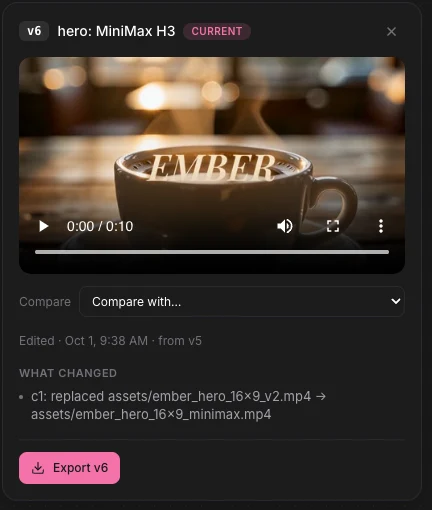
From here you can play that version, use Compare with… to play two versions side by side in sync, read what changed, or Export a full-quality render.
To make an older version the current one, ask in the chat: "go back to v4".
Press Esc to return to the player.
5. See every asset the video uses
Hover assets/ in Files and click Open media. The Media tab shows
every clip, image, and sound in the project — with its duration and where it
came from:
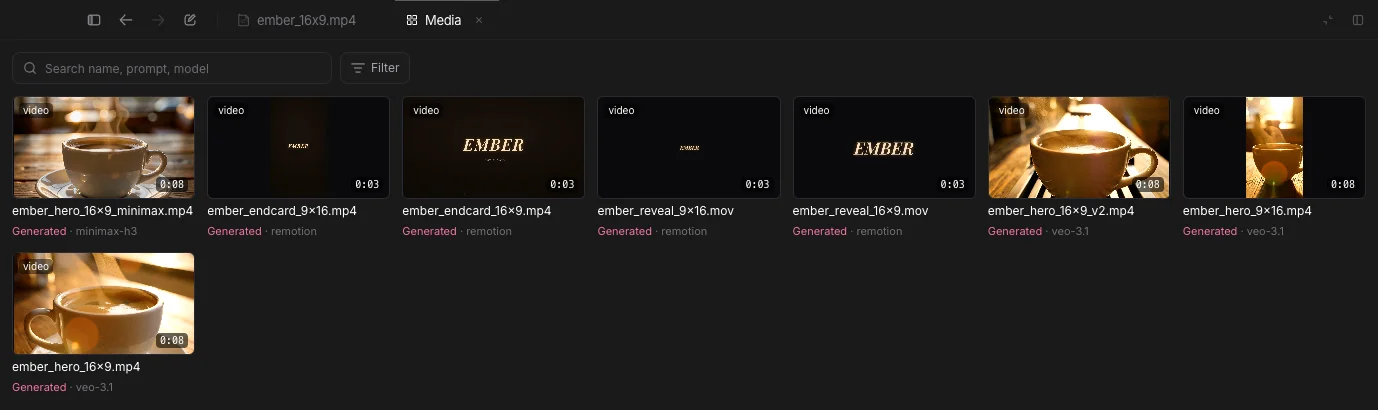
Use Filter to narrow the list to one video's assets. Click any asset to see its details:
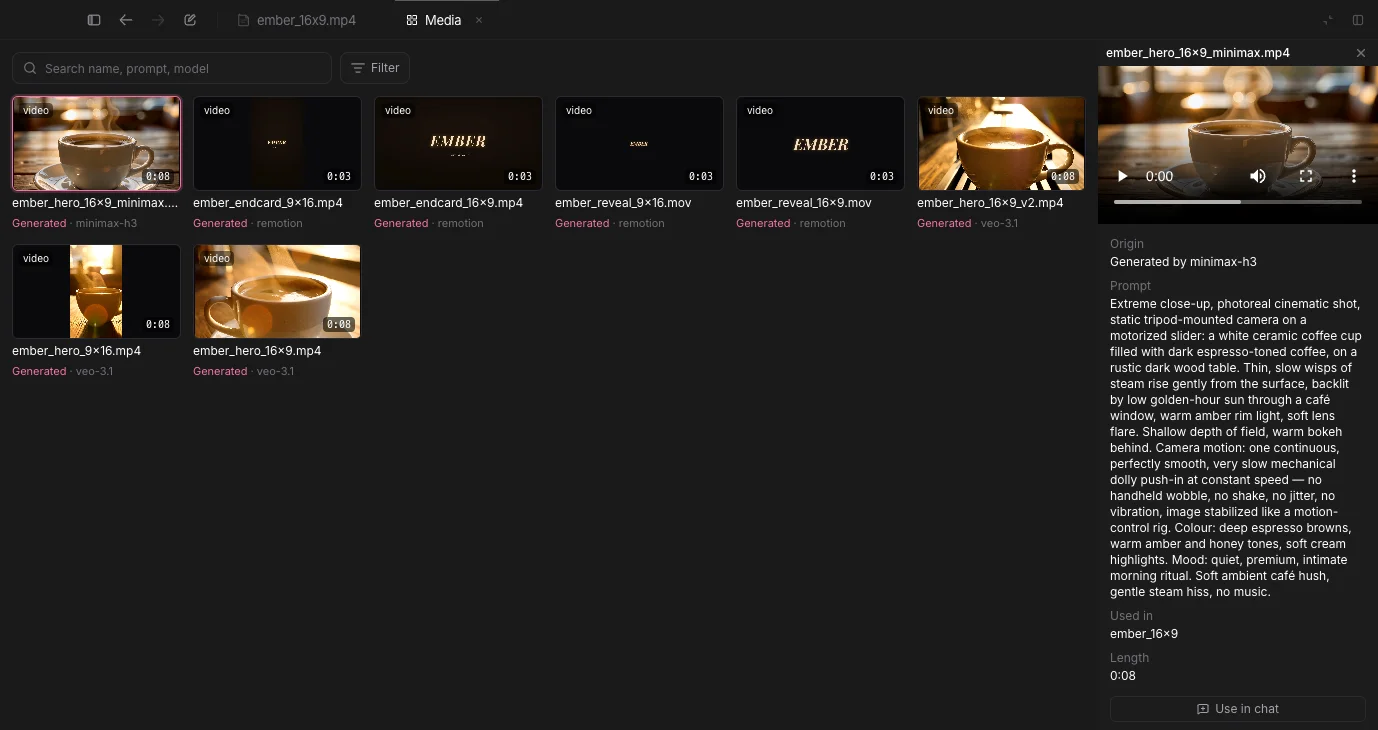
The detail panel shows the asset's Origin (yours, from a library, or generated by a specific model), the Prompt AdaL used to make it, and which Videos use it. Click Use in chat to reference the asset in your next message — for example, "use this shot as the opening".
Where the files are
Everything lives in your project folder. Nothing is hidden in an app database, so you can copy, back up, or version-control it like any other directory.
ember-teaser/
├── project.md             AdaL's plan for the project
├── assets/                every clip, image and sound the videos use
├── scenes/                animated titles and end cards
├── scripts/               small programs AdaL wrote to make assets
└── videos/
    ├── ember_16x9/
    │   ├── ember_16x9.mp4   the current version, ready to share
    │   └── previews/        a small preview of each version
    └── ember_9x16/
        └── ember_9x16.mp4
The .mp4 inside videos/<name>/ is always the current version. For a
full-quality file of an older version, use Export on the Canvas.
Tips
- Give the facts up front. Length, sizes (16:9, 9:16, 1:1), language, and the one thing the viewer should remember.
- Bring your own material. Drop footage, screen recordings, logos, or a voice-over into the project folder and reference them in your request.
- Change one thing at a time. One change per message means one clear version per change, which keeps the Canvas easy to read.